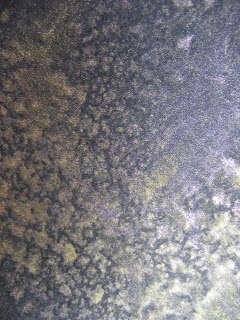
Having never done this before my worry is that I may not provide sufficient clarity or worse bore you to tears with too much blather, but will do my best and leave it to your honesty to tell me ! I decided it would be easier if I do two tutorials, the first with the basic techniques and another moving onto using stencils with GM's. All of this will be far from exhaustive, I'm still on the learning curve as well.
I have been using GM's for a year now and using them in classes and the novelty still hasn't worn off which is quite something with new crafting goodies. I have tried most of the 'similar' products on the market but in my opinion none compare with the intensity of colour and shimmer......that's the bit that comes from the high mica content in them.
First things first, preparation:
2) Lay out everything you will need, GM's, kitchen towel, cardstock.

3) Select the colours you want to use - in reality they all blend together, but some definitely lend themselves to one another better thank others such as Honey Dew Mist and Lemon Zest, Timeless Lilac and Kiwi, Seafoam or Turquoise with Sandy Beach or Vanilla. We all have our preferences and these are just mine but will provide a good basis for starting your collection so you get best use out of your GM's. There are also two essential 'special' sprays that in my view everyone using GM's needs in their stock - Iridescent Gold and Pearl, these are white/cloudy to look at but added as a final spray give the finishing shimmer and blend the colours.
Priming your GM's:
Priming your GM's:

When you look at a bottle of GM you will see sediment in the bottom, this is the mica - shimmer element. Even if it is only a few minutes since you last used a bottle, you still need to follow this procedure as the mica settles very quickly. Roll the bottle between your hands until you see movement of the mica then shake vigorously until the sediment is all incorporated into the liquid. This may sound like teaching you to suck eggs, but do make sure the top is on, you wouldn't believe how many times I have seem someone shake without the top on and I guess you can imagine the result - GM's ceilings can be nice if you like that sort of thing I suppose !
Basic Spraying technique:
The effect you create will be dictated by the way you spray and the height from which you spray. A swift left to right movement with the bottle held about 12" above your cardstock with gentle pressure on the nozzle will produce a nice fine misted effect The lover you move to the cardstock the thicker the intensity of colour.
People often ask me why they get a 'blobby' effects regardless, but this is usually down to technique. This picture shows where you finger should be placed on the top of the bottle, any further forward the spray will hit your nail, drop down to the card and this is what creates the 'blobs'.
Start with the palest colour first and build up with your darker colours. With practice is is quite easy to create a 'custom' piece of cardstock with colours where you want them like on this card or this one for example. Alternately spraying randomly you can create pieces like this one and some fantastic colour blends can be achieved.
A note on drying, you can use a heat gun to speed it up but if you have a lot of GM on your piece it's likely to make it run across the card, so try heating from the back. I prefer to let it dry naturally as it takes half hour at most. I tend to line them all up in the warmest place which is the conservatory in the summer (dog paw marks can be nice if you put them on the floor as I did last week) or across a radiator. You can see the mica twinke in the sunlight as it dries - little things !!
Using your 'Two Special Sprays':
Once you are happy with your colourways, this is the time to use your tw o 'special' sprays. There are two ways to do this, you can either spray immediately after spraying the other inks and you will see rapid bleeding of the colours which blends them together. Alternately, allow your carstock to dry and then spray with your 'special' spray, this will still persuade the inks to bleed but in a far more subtle way. The two samples below have both been sprayed with Lemon Zest and Honey Dew Mist. The one of the left was given more of the two main colours and Pearl sprayed on when wet. The one of the right had a lighter spray of the same two colours, was left to d
 ry and then sprayed with Pearl. Two totally different effects.
 o 'special' sprays. There are two ways to do this, you can either spray immediately after spraying the other inks and you will see rapid bleeding of the colours which blends them together. Alternately, allow your carstock to dry and then spray with your 'special' spray, this will still persuade the inks to bleed but in a far more subtle way. The two samples below have both been sprayed with Lemon Zest and Honey Dew Mist. The one of the left was given more of the two main colours and Pearl sprayed on when wet. The one of the right had a lighter spray of the same two colours, was left to d
 ry and then sprayed with Pearl. Two totally different effects.
 Now is perhaps the time to say when you look at a piece such as the one on the left you might want to bin it because it's a bit messy. Don't because by the time you have stamped onto it everything blends together and the imperfections fade into the background.
Obtaining a softer finish:
If you prefer a softer finish, follow the basic spraying technique above but immediately after spraying dab it with a piece if scrunched kitchen towel. This produces a lovely base for adding more sprays from a similar colour family to achieve a nice mottled finish. I will cover this again in my next tutorial using stencils. Never waste a drop:
After a spraying there is inevitable a residue of ink on your silicone mat, never ever waster this. I always keep lots off offcuts ready and place them onto the mat to soak up the ink, if you squish your cardstock around you will pick up most of it. The same process can be followed after each colour has been used and you can end up with some fantastic colour combos quite by chance.
 Never waste a drop:
After a spraying there is inevitable a residue of ink on your silicone mat, never ever waster this. I always keep lots off offcuts ready and place them onto the mat to soak up the ink, if you squish your cardstock around you will pick up most of it. The same process can be followed after each colour has been used and you can end up with some fantastic colour combos quite by chance.
Maintaining a good even Spray:
Sometimes the spray nozzle blocks and you get a blotchy spray. You can easily clear this by unscrewing the top and running it under cold water.
Maximising effort:
Lots of people tell me they can't be 'faffed' with GMs' because they are messy. That's all part of the fun, but they are only as messy as you make it and if you prepare property the clear it all away as soon as you finish the mess is minimal but the satisfaction element great. I tend to have a 'GM session', get the whole lot out and spend an hour or so creating a stockpile ready for use.
Colour bends and results:
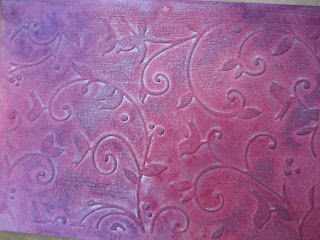
There is no limit to the wonderful finishes and effects you can achieve with GM's and below are just a few examples. The top left was done using black cardstock with Rum Raisin, Timeless Lilac, Gold and final spray of Iridescent Gold. Top left is onto white cardstock using Pink Bubblegum, Black Cherry adn Timesless Lilac, then run through the bug using birds and swirls folder and a final spray added of Pearl. It's always difficult to get the shimmer in pictures, but believe they all have a wonderful sheen.
The bottom left is for a project I am working on but afraid you will have to wait until Sunday to see it as it's some of my DT work. Colours used here are Midnight, Rose Tea, Seafoam, Sunflower and Gold. I sprayed this piece to tie in with a stamp and with careful panning it fits 'what I needed where' perfectly. The bottom right piece was stamped with versamark and embossed with detail clear before spraying to create a resist effect, then sprayed with Coral and Gold.


The bottom left is for a project I am working on but afraid you will have to wait until Sunday to see it as it's some of my DT work. Colours used here are Midnight, Rose Tea, Seafoam, Sunflower and Gold. I sprayed this piece to tie in with a stamp and with careful panning it fits 'what I needed where' perfectly. The bottom right piece was stamped with versamark and embossed with detail clear before spraying to create a resist effect, then sprayed with Coral and Gold.


So in conclusion after completing my 'novel' I hope this will help some of you, inspire others to buy some GM's and have some fun and those of you who fall into the 'faff' category to give it another go and I would love to see what you create. Please do have a wander around my blog and look as some of the samples using GM's - the link on the sidebar is probably the quickest way to find them and feel free to ask me any question you have.


No comments:
Post a Comment